|
In south India, there are lot of foods that are available for breakfast, lunch and even for dinner. Among them, idli is regarded as one of the staple foods. It can be served in breakfast with sambar and also people can have it with pickle. This breakfast recipe is now popular all over India and people love it because it is very healthy and oil free. It is mainly made up of rice and white split bean (urad dal). This dish is relished with coconut chutney. It is highly recommended by doctors as a breakfast food because it offers health benefits. Steps for Idli Recipe 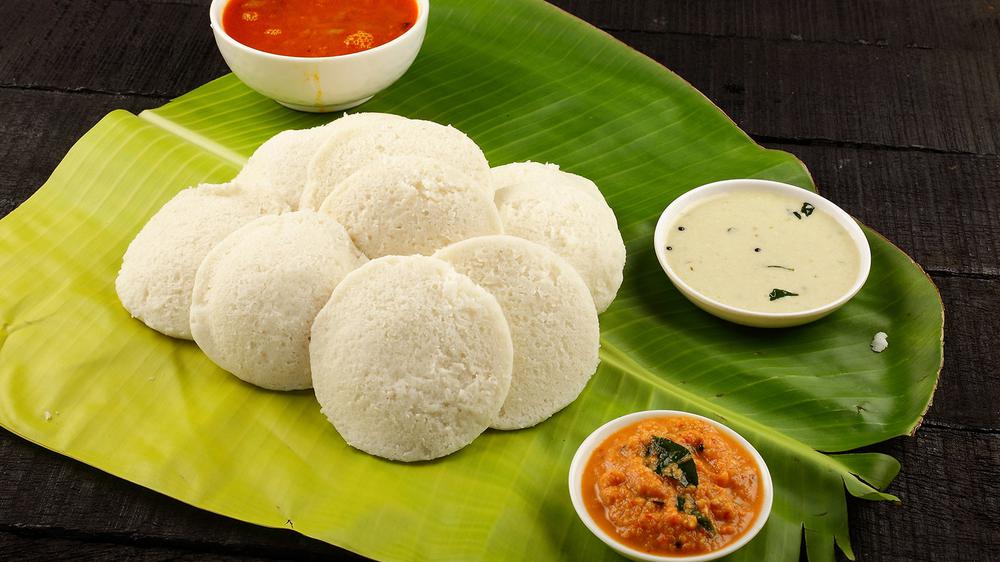 Idli Recipe The batter that is used for idli is very much fermented and the rice is not fried, this helps in making idli a healthy food item. The recipe of idli is not that much complex, it can be made by just knowing the basic steps. Here are some tips that you can keep in mind about idli recipe.
Once you prepare this staple of south India, you may want to make it again and again. Idli recipe is very easy, healthy, and can be made in less amount of time. It can be enjoyed as a breakfast, lunch or dinner. It can be relished with chutney, sambhar, or just pudis or pickles. Make it now and relish it.
0 Comments
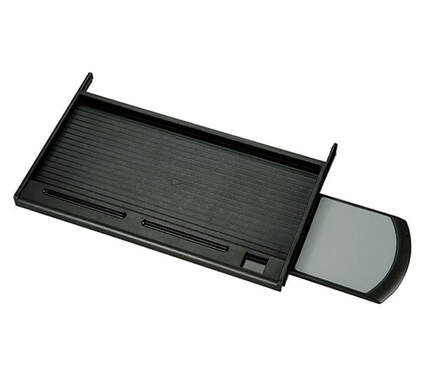 Keyboard Drawer When you design an ergonomic workspace, the first thing you do is to purchase computer accessories to make working on the computer easy and comfortable. Yet, you may ignore a keyboard drawer as that may seem to have less importance. Typing position while working on a computer is as important as any other factors related to body posture.
A keyboard Drawer help you to enhance typing comforts and avoid many health issues such as carpel syndrome, wrist pain, pain on the shoulder and so on. With ergonomically designed computer accessory you can maintain the best typing position as keyboard tray or drawer is features with many options such as tilting, adjusting position, increasing and decreasing the heights and so on. You can also tilt the keyboard in opposite position to prevent stress on the fingers and arms. Basically, a keyboard drawer or tray is designed to adjust position based on the body position of the user. This way you can eliminate pain and stress of arms, fingers, writes and shoulders by incorporating a keyboard tray in your office. Let us see some of the benefits we can enjoy using keyboard trays or drawers. Generally, a keyboard drawer differs from a tray for its holding unit, which is fixed to the computer table. The drawer is featured with pull in and pull out options which allows the user to pull out the tray when requires and pull it back under the desk when the drawer is not in use. Some of the advantageous of using Keyboard Trays and Drawers Eliminate pain and injury: While working on a computer, the mouse and keyboard if not placed properly, the long hours of typing could lead to injured muscles and nerves. This in long term could lead to everlasting illness. By incorporating a keyboard drawer, you can avoid carpel tunnel Syndrome and other illness owing to wrong position. By maintaining wrong arm and hand position, you can also injure the pressure points too. Increase efficiency: You can create an ergonomic workspace with a keyboard drawer to increase efficiency and productivity. When you have comfortable working environment, the concentration and work speed increase leading to increase efficiency and productivity at work. Maintain Right arm position: Unlike the fixed keyboard drawer, you can configure the correct angle and position to maintain good arm and finger position. With a flexible ergonomically designed keyboard tray, you can pivot, lower, slide, and angle, your typing surface. Which will help you eliminating leaning bending and stretching and of your body parts. With a plethora of keyboard drawer, you can choose the best suited color, design or model based on your requirement and interior. 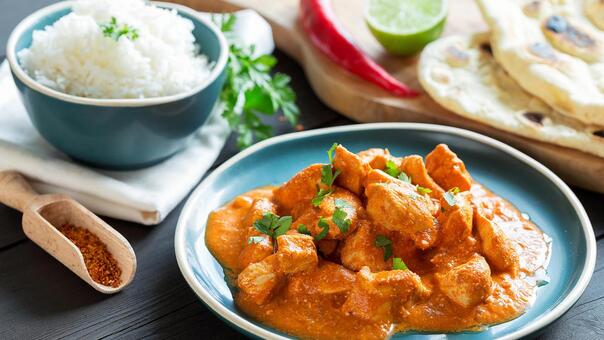 Butter Chicken Recipe The love affair that North India has with butter chicken is very much evident. But it is very surprising to know that the staple food of north India was not even a part of their cuisine in the 1950s. It was later on when the people discovered the fact that they can cook chicken in a pattern where they can add gravy to it. Thus came the very famous butter chicken recipe. Initially the leftovers of tandoori chicken were cooked with tomato gravy and through this process the chicken’s moisture was regained and butter chicken went onto rule the hearts of millions of Indians in the coming years.
More Information on Butter Chicken The butter chicken recipe is a very delicate one; it has the perfect blend of taste and fragrance in it. Though one can gain a lot of calories with butter chicken but it will surely help in making your taste buds drool for a long period of time. Butter chicken is best served with tandoori roti and naan; it is deadly combination that many other dishes cannot match. The steps for preparing butter chicken are as follows: 1. It is very easy to prepare butter chicken at home and if one can know the recipe properly then it can be cooked in less than an hour. Initially, some utter should be taken in a pan and some pieces of ginger, garlic, onions are added in it. Let the onions get softer slowly and then add some red chillies, bay leaves, cashews, black cardamom and tomatoes as well. This should be cooked for some time and then the mixture can be transferred into a fine paste. 2. In order to get some extra flavour, one can add coriander leaves as well. This will surely enhance the taste of butter chicken; Kasmiri red chillies are also famous for adding up the flavour quotient in a butter chicken dish. It might spice up the dish but people will surely love the spice. The chicken needs to be marinated from before if one wants to have the moist texture of it. 3. It should be marinated with a mix of mustard oil, yogurt, ginger-garlic paste, salt and some other spices. It should stay like this for an approx time of 15-20 minutes; the flavour of the spices needs to sink in the meat properly. Then the marinated chicken should be roasted in an oven for some time; it can be a minimum of 10-12 minutes. Later on, shred the chicken and mix it with the gravy in a pan of some added butter. Lastly, add garam masala and your butter chicken is ready to serve. Hope this butter chicken recipe is very usefulfor the budding chefs. |
AuthorWrite something about yourself. No need to be fancy, just an overview. Archives
September 2021
Categories |
 RSS Feed
